Click logo to return to home page. ]

 
Home>Forums>Show Your Stuff!!!>Westland Lysander refurbishment. Post Reply   New Topic   
Forum Jump 21 Pages 1 2 3 4 5 6 7 8 »
] ] ]
]
Author / Post
Avatar User Offline Alan
Site Supporter
Site Supporter
Joined: December/10/2003
National Flag of United States United States
Posts: 14447
IP Logged
Posted: March/21/2020 at 9:56am  Quote
 
This one works


__________________
Please engage Brain before operating tongue or machinery.
"Scale Detail equals Weight"
Alan
Woodway, TX
 
Back to Top  Printer Friendly Version  Profile  Search 
 
Avatar User Offline Geezer
Lifetime Site Supporter
Joined: January/19/2008
National Flag of United States United States
Posts: 17544
IP Logged
Posted: March/21/2020 at 10:59am  Quote
 

Lovely panel, my favorite parts you know. the dustiness just adds to the used and not coddled look!

Doc


__________________
Rule 1 Power, Use lots, don't be needy!
2 Build light they fly better!
If it was easy everyone would do it!
There's a reason its called scale and not similar.
 
Back to Top  Printer Friendly Version  Profile  Search 
 
Avatar User Offline Dowmer
Lifetime Site Supporter
Camas, WA Scale Knut
Joined: December/23/2008
National Flag of United States United States
Posts: 5240
IP Logged
Posted: March/21/2020 at 11:41am  Quote
 
Ken, love the work mate. Just my .02, but being a military aviator I've sat in a lot of functional cockpits and I've never sat in one that was tidy clean without a dusty cockpit/instrument panel if it's been used for any amount of time. Yours looks spot on. Please don't clean it too much.

__________________
Scratch building:
Travel Air Mystery Ship 1/4
Flying:
FW-190 D9 1/5 Scale
Bendix Special
 
Back to Top  Printer Friendly Version  Profile  Search 
 
Avatar User Offline Dragon Slayer
Lifetime Site Supporter
Dragon Slayer
Joined: August/04/2006
National Flag of Australia Australia
Posts: 8065
IP Logged
Posted: March/21/2020 at 5:21pm  Quote
 
Thanks to Doc and Jason for their helpful observations and recommendations.

Yes, when I first examined the dash it was really heavily layered with 12 years of dirt and dust. I did rather like it, but perhaps it was over the top. The pic shown above is after cleaning ! I ceased to scrub with an old soft tooth brush having paid more attention to the raised part of the panel than the side bits to hopefully give it more perspective. Lucky for me I seemed to have ceased the cleaning in the nick of time. Pure guestimation as (surprise, surprise) I had never sat in a Lizzie cock pit. 

This site is so good as there always seems to be a professional lurking in the sidelines who knows the exact answer to the question "enough or too much?" Thank you again, Jason!

Ken


__________________
To repair.
102" Meister P-47 Moki 150
1/4 Scale P-47 Moki 400
To maiden
Fatface Skyraider DLE 130
Ziroli Hellcat Moki 150

Flying ...
Westland Lysander 168" Moki 250

 
Back to Top  Printer Friendly Version  Profile  Search  Web 
 
Avatar User Offline Dowmer
Lifetime Site Supporter
Camas, WA Scale Knut
Joined: December/23/2008
National Flag of United States United States
Posts: 5240
IP Logged
Posted: March/21/2020 at 6:23pm  Quote
 
Glad I could help Ken. The only thing I would do is make sure the instument faces and glass are clear. Maintainers will replace, clean etc the gauges.

__________________
Scratch building:
Travel Air Mystery Ship 1/4
Flying:
FW-190 D9 1/5 Scale
Bendix Special
 
Back to Top  Printer Friendly Version  Profile  Search 
 
Avatar User Offline PeterOZ
Site Supporter
Site Supporter
Joined: April/04/2009
National Flag of Australia Australia
Posts: 2382
IP Logged
Posted: March/21/2020 at 7:27pm  Quote
 
Quote: Dragon Slayer
Here is a teaser. It is a short video clip of the Lysander at the Temora Classic of 2008. There are other planes, too.

It was her first round of her first comp. Grey day with bad cross wind. Things were going quite well until the fuel tank clunk fell of and a dead stick shortly followed. That was round one ! 

https://www.youtube.com/watch?v=vJiPKFqlbSE

Ken

Couple of models there that are no more.  Steve T's B-17 and Richard S's P-38 UnhappyDisapprove


__________________
FlairAstrohog PICA 65" spitfire Mk IX JMI P51 82" TF P47 85" Vailly Seafury 90" SIG 1/4 Cub H9 1/4 Tiger Moth H9 1/3 Pawnee H9 RV-4 H9 Fokker DVII
TopRC FW-190A7 35% Cessna 182T Yellow Spitfire MkXIV
 
Back to Top  Printer Friendly Version  Profile  Search 
 
Avatar User Offline Dragon Slayer
Lifetime Site Supporter
Dragon Slayer
Joined: August/04/2006
National Flag of Australia Australia
Posts: 8065
IP Logged
Posted: March/21/2020 at 7:28pm  Quote
 
Will do, Jason. 

Well, this has been another day of exploration and discovery. I really am enjoying doing up the old girl. The stuff I am finding to fix is amazing. I probably should have done this 6 years ago. Although ... she did have an overhaul 5 years ago!

Here is a mish-mash of low order discoveries.

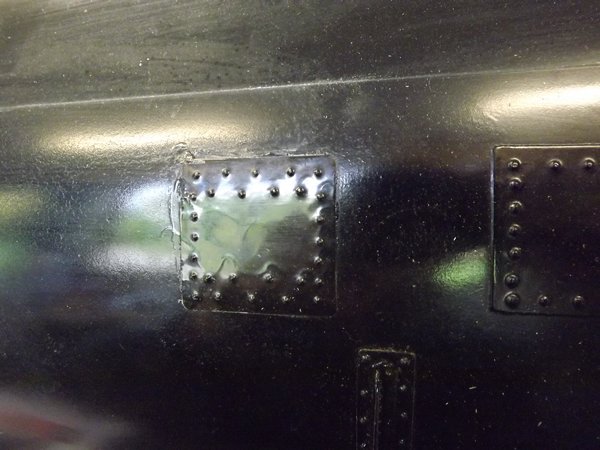
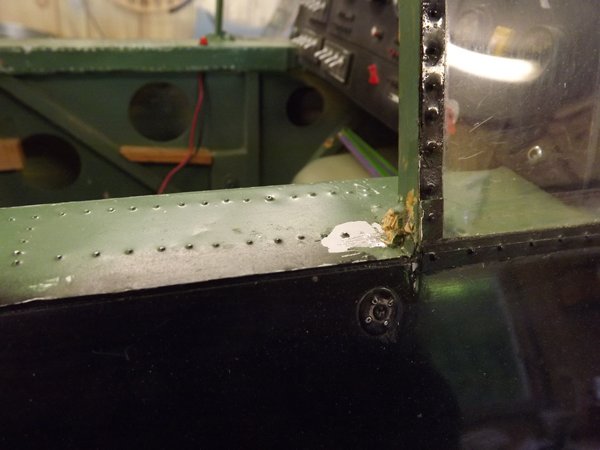
The area in and around the front cock pit canopy was being attended to when I noticed a squarish patch of rivited litho that had obviously been added to the skin below the cock pit for some reason. I would had left it alone save for the fact that it was a bad cover up. Check this mess out!


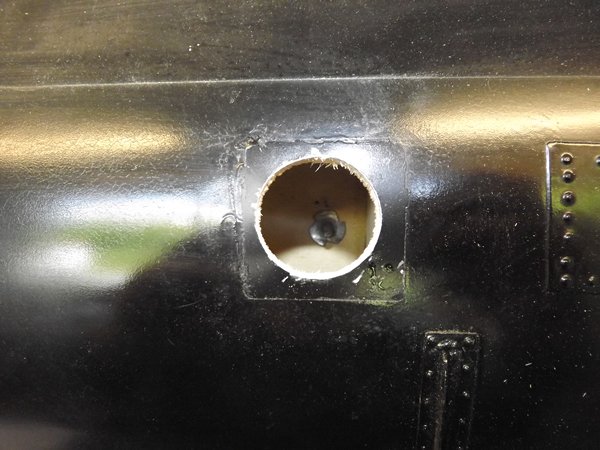
Now that is a mess ! What was I thinking. It had to come off. What on earth was it doing there ... what was it to hide?


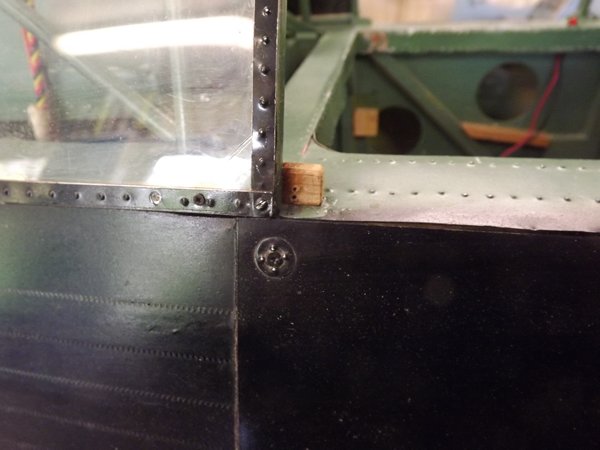
Ah, so that's it! Now I remember that I had had to make a big hole to get to that T nut which was one of those hidden between skins. I would have dislodged it when removing all the bolts that hold the big steel fingers that stabilise the chrome moly undercart. I took it out a few years back as I mentioned before to straighten out the slight splay back then. The hole was drilled through litho, f/g cloth and resin and balsa wood.


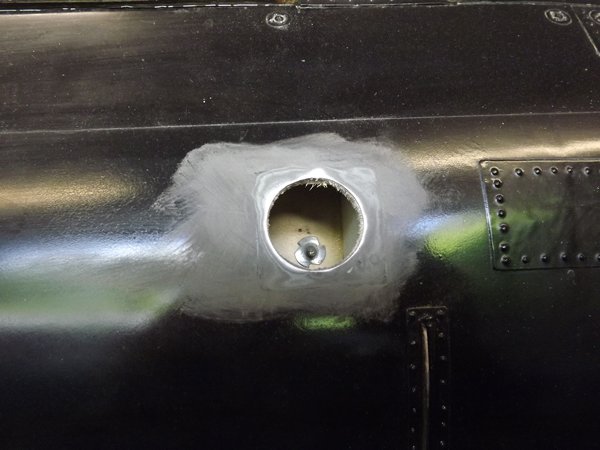
The surrounding area has been rubbed back in prep, for a new, decent plate. The one to the upper right is scale.

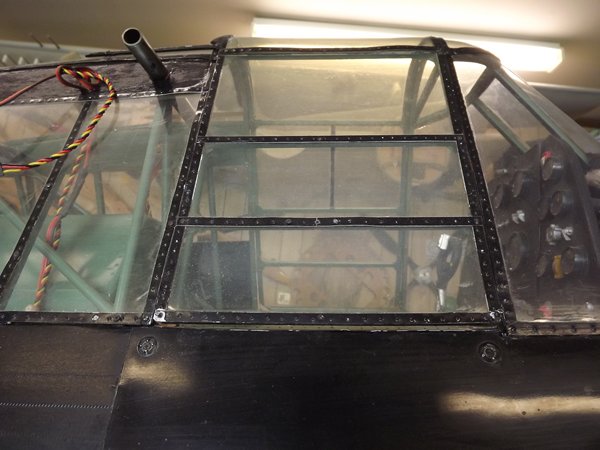
Next: the canopy rail blocks had split in some cases and have to be replaced.


Front canopy in place. The lower corners have small blocks behind for the tiny fixing screws to go in.


I glue the blocks in and then later when all is solid and dry I sand them to a slimmer, smaller shape and paint green.

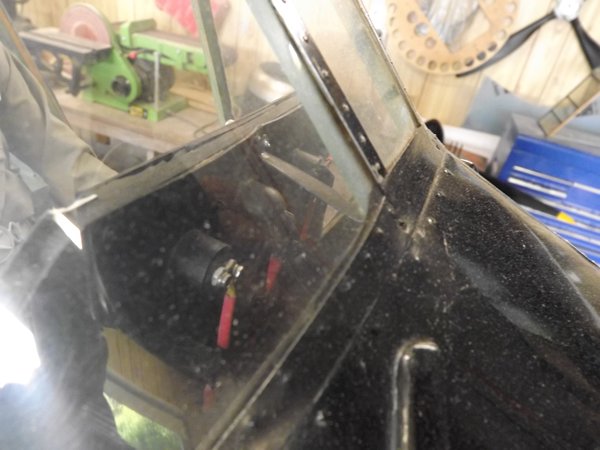
While in the area I thought it best to check markings and have a look see behind the instrument panel.


Needs a clean up. There is not much I can do wrt the sun streched litho frames. I have added tiny screws here and there. They should be replaced. Later ... maybe.


The SOE mission count. Looks fine to my eye.


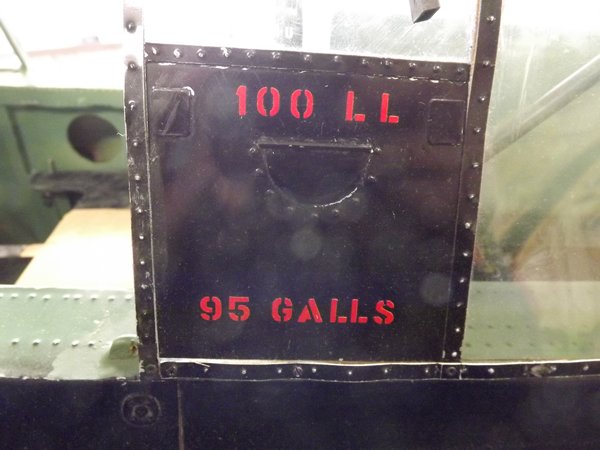
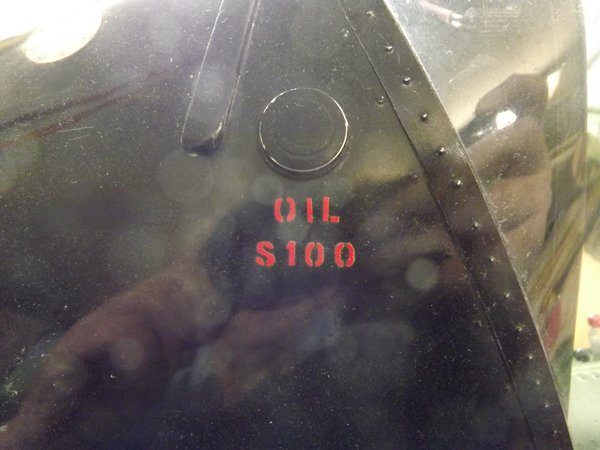
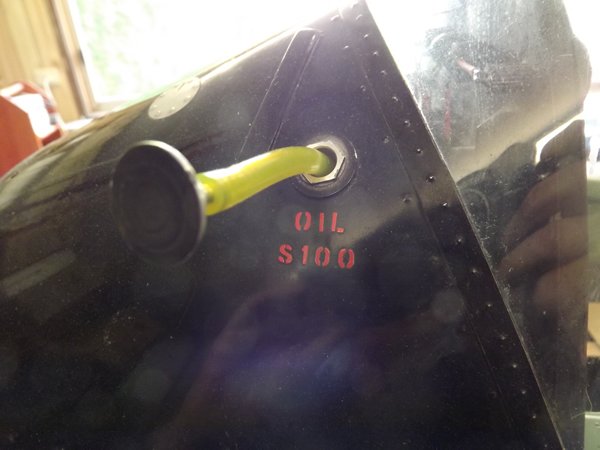
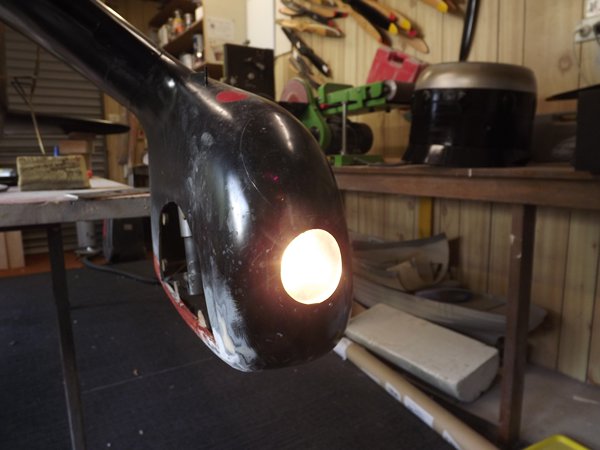
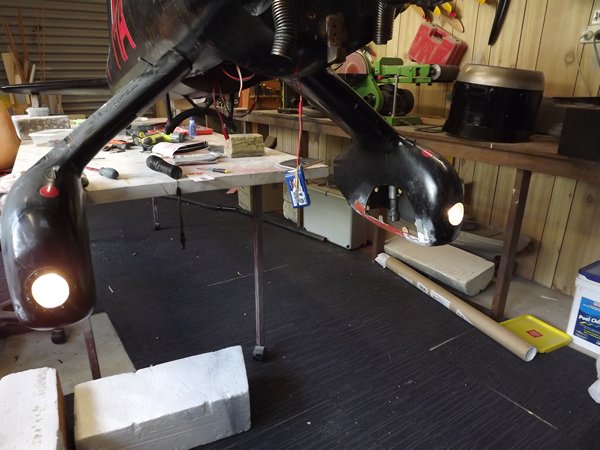
It was very convenient to have the oil filler cap in that position ...


It doubles as my petrol filler line.


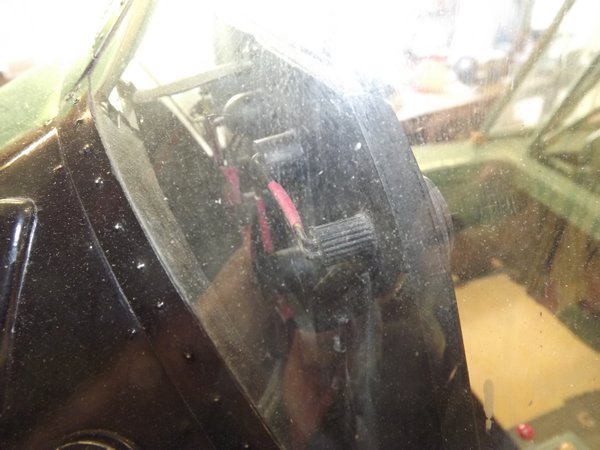
The back sides of all the lumpy big instruments hang out with all the wires shrink covered. Sorry re the dusty pic. The slight yellowing of the perspex (PETG!) seems appropriate.  Does it not?


__________________
To repair.
102" Meister P-47 Moki 150
1/4 Scale P-47 Moki 400
To maiden
Fatface Skyraider DLE 130
Ziroli Hellcat Moki 150

Flying ...
Westland Lysander 168" Moki 250

 
Back to Top  Printer Friendly Version  Profile  Search  Web 
 
Avatar User Offline Dragon Slayer
Lifetime Site Supporter
Dragon Slayer
Joined: August/04/2006
National Flag of Australia Australia
Posts: 8065
IP Logged
Posted: March/21/2020 at 7:48pm  Quote
 
I posted the above so that my fumble fingers did not wipe out that already posted. Don't you hate it when you do that? No, you probably are not that silly! 

Next: When the flaps are deployed to "full" the landing lights come on. You can have half flap and no lights. 

With testing ... no lights came on. There is a small micro switch that is triggered by a servo arm which rotates according to flap postion. The arm was for some reason missing the little metal micro switch arm.


This was the easy go 12 years ago when we still flew on PCM  with not much (on my old set) in the way of electronic goodies. By and large it was a reliable set up ... until now all those years later. Easy fix ... the servo arm screw was not all the way home so the arm undercut the ms lever. The screw was tightened up and all was good.

That is a Booma Life 3400 mAh, 6v battery you see tucked up. There are two of them for the JR Powerbox Rx. and three sats. The ignition (old Moki 215) is only a 4.8 v Eneloop 2500 mAh. It was advised by Moki not to use 6v on these old units. Beware.


Full flap and on she comes. Very bright. 12 v Halogen off a 11.1 v lipo.


A cut off voltage gizmo is not used. The battery is only working for a short time on landing as I can cruise around with half flap (no lights) for ages without worrying about flattening and ruining a lipo.

Time for lunch break.

Ken


__________________
To repair.
102" Meister P-47 Moki 150
1/4 Scale P-47 Moki 400
To maiden
Fatface Skyraider DLE 130
Ziroli Hellcat Moki 150

Flying ...
Westland Lysander 168" Moki 250

 
Back to Top  Printer Friendly Version  Profile  Search  Web 
 
]
] ]
Forum Jump 21 Pages 1 2 3 4 5 6 7 8 »


  Post Reply   New Topic   

] ] ]
]
   ]
Similar topics you might be interested in...
Westland Lysander build....
Westland Lysander
My Westland Lysander
Westland Lysander Mk III for F4C or H
You cannot post new topics in this forum
You cannot reply to topics in this forum
You cannot delete your posts in this forum
You cannot edit your posts in this forum
You cannot create polls in this forum
You cannot vote in polls in this forum
]
] ]

Home Icon Portal Home   Forum Icon Forum Home   Forum Icon Your Privacy

Copyright © 2003-2024, RCSCALEBUILDER.COM, All Rights Reserved