| Author / Post |
|
 Sparky

Lifetime Site Supporter
Head Curmudgeon
|
Joined: February/10/2004
 United States United States
Posts: 7543
IP Logged
|
| Posted: September/18/2024 at 7:39pm |
Quote
|
|
Steve,
I last flew in 2011 or so. At one time we flew in IL, TX, OH so it was almost convenient. The last I checked there is only one race per year conduced in CA. Travel became a burden in time and money. It was a heck of a lot of fun but also expensive to put together competitive airplanes. There was an effort and discussion about flying at the AMA Muncie location but they apparently couldn't generate enough interest. I had mine out last year with a freshened engine and was getting prepared to fly.
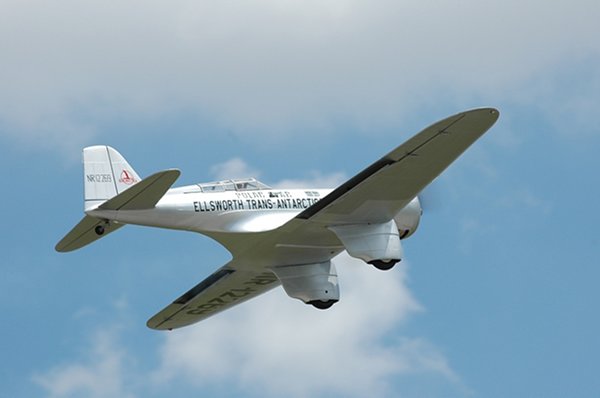
Boy those airplanes are fun to fly!
Sparky
__________________
Brown County, Indiana
TopRC FW-190, Zenoah GT-80
Bates F6F Hellcat, Saito FG60-R3
Gamma RIP 
|
| Back to Top Printer Friendly Version Profile
Search
|
| |
|
rb27989
Site Supporter
|
Joined: January/19/2023
United States
Posts: 677
IP Logged
|
| Posted: March/31/2025 at 2:32pm |
Quote
|
|
Well, it's PM time, although this will be a little more extensive than just making sure everything is tight and working properly. After my last flight last year I have a checklist of things that need to be corrected to make this bird an everyday flyer.
Checklist: * Replace spinner (can't keep the center bolt style on the plane) * Better attachment of the air scoop. * Change out the rear center canopy rail for something more substantial. * Rudder repair (the top of the rudder broke at a weak spot around the top hinge.
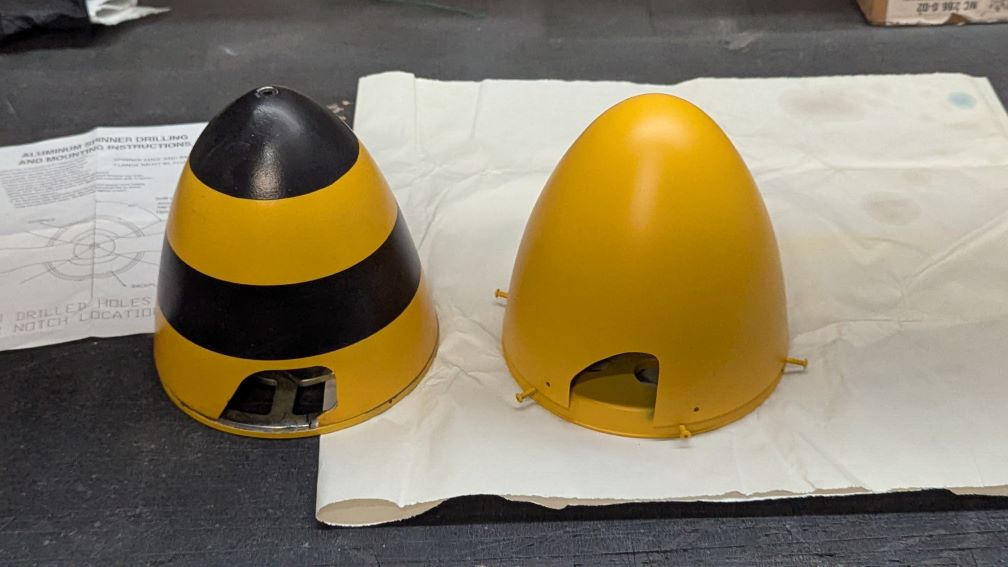
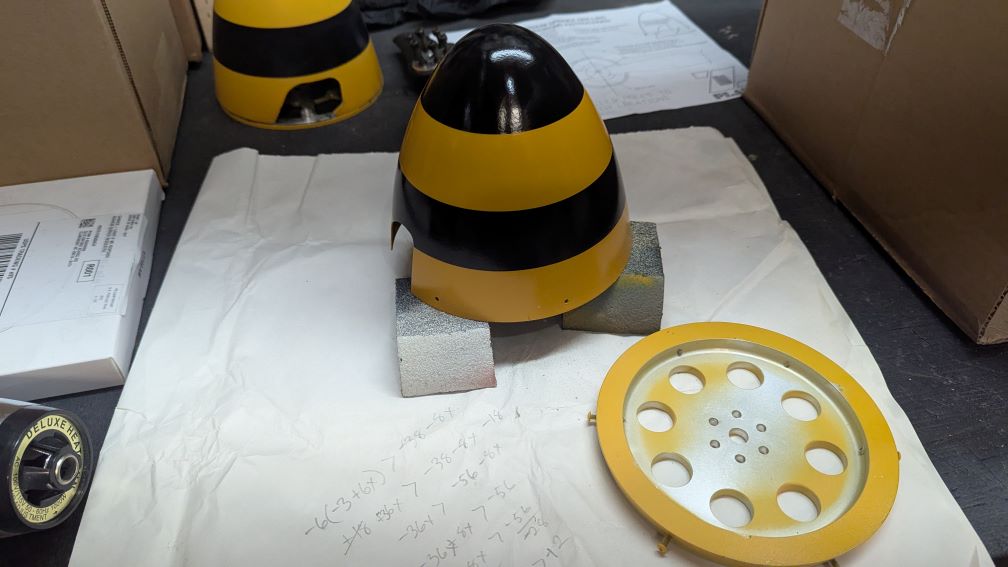
First up is the spinner. I was flying a 6" miracle spinner; the problem is the back plate is just too thin and the tip of the spinner is bulky and heavy. I kept shearing the bolt that holds the spinner on, then resorted to gluing it on. I picked up a 6" Ziroli quite a few months ago in anticipation of replacement. My initial fear is the Ziroli is going to be heavy and throw off my balance. Especially since I have to move the engine 5/16" further out from the firewall. Turns out the Ziroli spinner only weights 1oz more than the Miracle spinner does. Plus all the weight of the Ziroli is in the backplate instead of an extra 6 inches out in front. So I think the weight movement will be a wash and if anything will be to the nose and not the tail.
I built up the firewall with some 1/4" aircraft ply and a couple extra washers to get the proper fit. Turned out really nice. I now have the spinner notched, drilled, taped, etc. On to the finishing where I have it primed, and the base yellow coat on. Next up will be the black stripes and then the clear coat.
Miracle on the left and Ziroli on the right.
|
| Back to Top Printer Friendly Version Profile
Search
|
| |

|
Steve_O
Site Supporter
|
Joined: October/29/2004
United States
Posts: 3923
IP Logged
|
| Posted: April/01/2025 at 5:51am |
Quote
|
|
Looking good Ryan.
An extra ounce or so on the nose will not likely be noticeable.The problem i have found over the years with large spinners is the bolt distorts the backplate causing clearance issues with the cowl, the Ziroli version will eliminate that problem as well.
The Ziroli spinners are more work fitting the prop and drilling and tapping the cone attachment screws but certainly worth it in the end.
__________________
50% Smith Miniplane
(2) Extra 300's
BUSA: Eindecker, SE5a, D-VII
Ziroli: Skyraider, Stuka, P-40
GP Ryan STA
Building: BUSA Ercoupe
Reidsville, NC
|
| Back to Top Printer Friendly Version Profile
Search
Web
|
| |
|
|
rb27989
Site Supporter
|
Joined: January/19/2023
United States
Posts: 677
IP Logged
|
| Posted: April/01/2025 at 7:10am |
Quote
|
|
Quote: Steve_O
The Ziroli spinners are more work fitting the prop and drilling and tapping the cone attachment screws but certainly worth it in the end.
Yea, so far I really like these spinners but you do have to take your time with all the drilling, tapping, cutting and measuring. But well worth the time to get it right.
|
| Back to Top Printer Friendly Version Profile
Search
|
| |
|
|
rb27989
Site Supporter
|
Joined: January/19/2023
United States
Posts: 677
IP Logged
|
| Posted: April/01/2025 at 3:15pm |
Quote
|
|
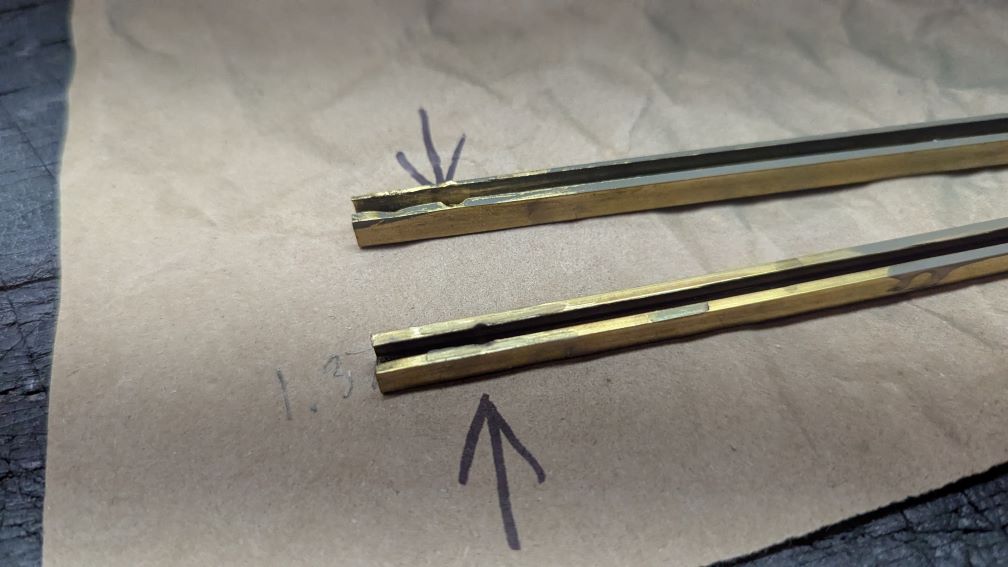
Last nights project was to upgrade the rear canopy rail.
The arrows are pointing to the holes that are being worn in the brass rails by the rear canopy mount bolt. The top rail in the photo failed when the hole became big enough for the canopy to pop our. Luckily I didn't loose the canopy but the landing looked cool with the canopy open  .
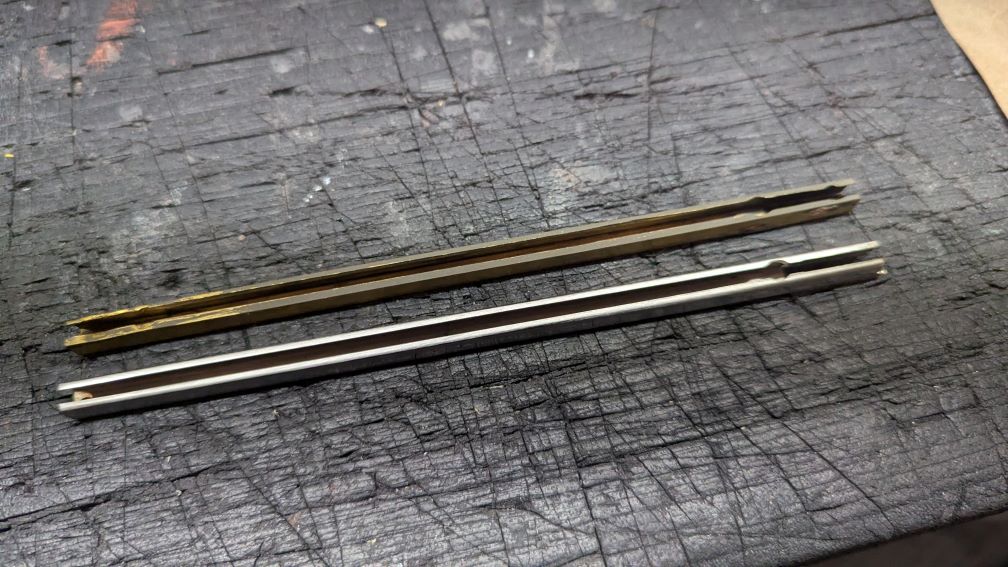
So to upgrade I am replacing the rail with stainless steel. I will be using stainless for any canopy rails going forward. My recently finished P-40 uses stainless for all of it's rails.
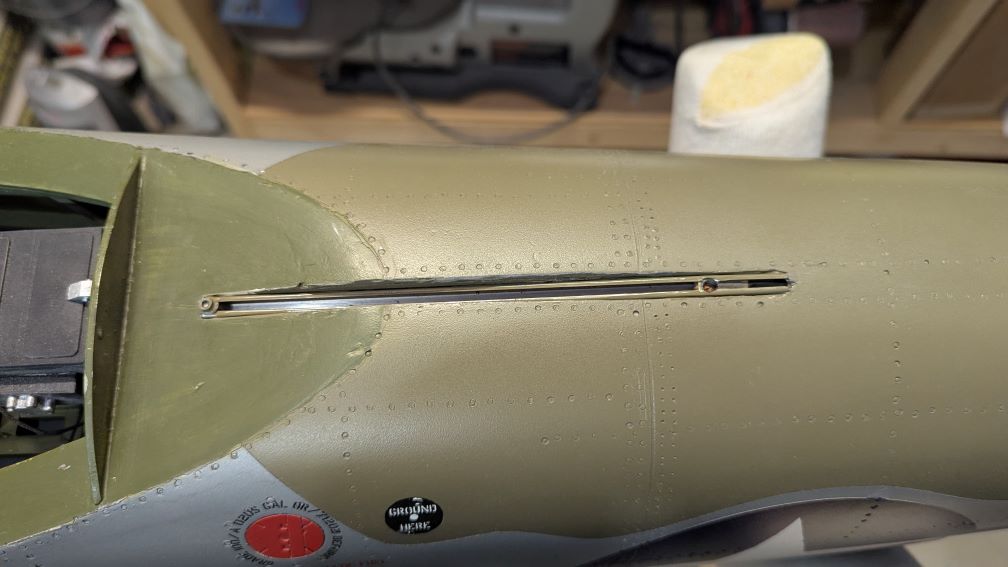
Here the rail is installed and painted. You can see the internal shuttle is in the beyond fully open position at an opening in the rail. This is for removal and install of the canopy.
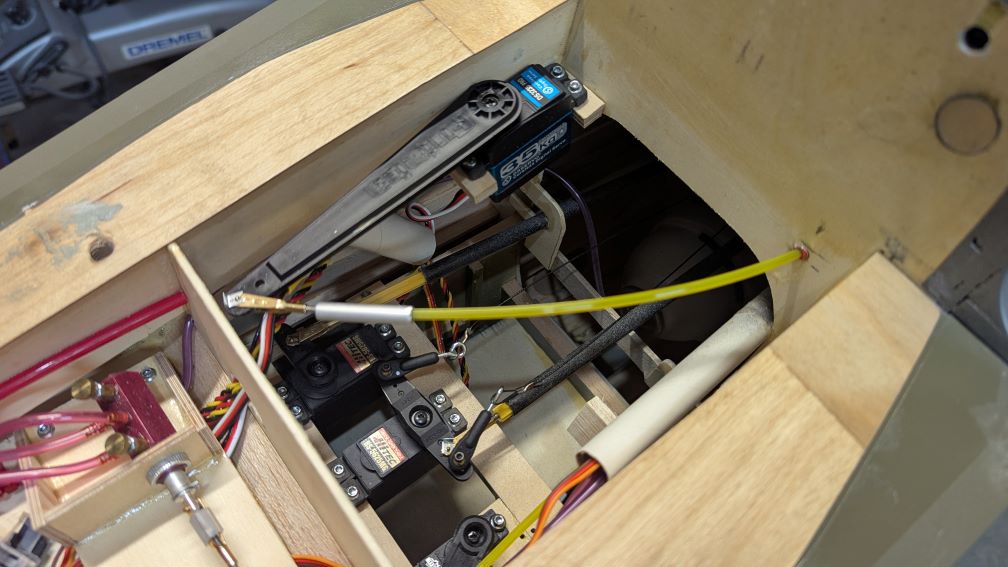
The driving mechanism for the canopy is a super torque servo with a sail arm servo horn pushing and pulling the nyrod driving the shuttle in the canopy rail. The nyrod has a stiff but flexible metal wire inserted in it for strength. The weakest point on this setup is at the joint that I have supported by a piece of aluminum tubing. I can't have any bending here or this will not work. For those familiar with my P-40 build, I like that setup for the canopy a lot better. This long servo arm here puts a lot of pressure on the servo.
|
| Back to Top Printer Friendly Version Profile
Search
|
| |
|
|
Sparky
Lifetime Site Supporter
Head Curmudgeon
|
Joined: February/10/2004
United States
Posts: 7543
IP Logged
|
| Posted: April/02/2025 at 8:10am |
Quote
|
|
To reduce vibration wear on the soft brass track. Slip a plastic sleeve over the bolt. A yellow Nyrod comes to mind but it might be too big of a Dia. Sparky
__________________
Brown County, Indiana
TopRC FW-190, Zenoah GT-80
Bates F6F Hellcat, Saito FG60-R3
Gamma RIP
|
| Back to Top Printer Friendly Version Profile
Search
|
| |
|
|
rb27989
Site Supporter
|
Joined: January/19/2023
United States
Posts: 677
IP Logged
|
| Posted: April/03/2025 at 9:08am |
Quote
|
|
Hey Sparky, I have thrown ideas around in my head similar to your suggestion but it's kind of such a tight fit, and alternately, anything softer than the surrounding is going to wear. I did fill the hole in the shuttle with gasket silicone to tighten that joint up and reduce the total amount of movement upon parts.
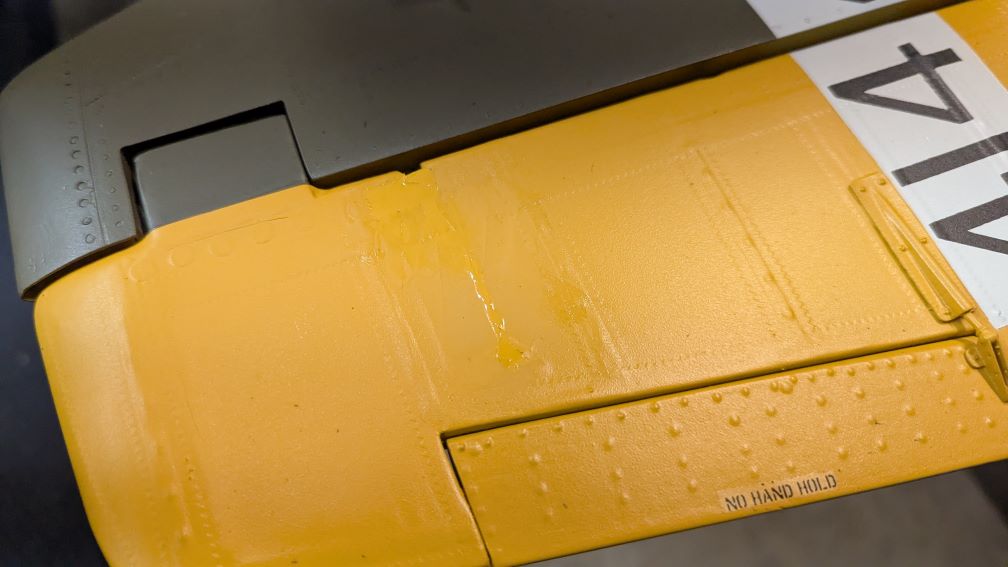
On to rudder repair.
I was anticipating having to open the covering up on the rudder but after going back and reviewing some photos of the rudder skeleton, I realized that there is a large balsa block behind the LE at this break. The weak point is in the LE at the hinge and apparently the balsa block was not glued well enough to the LE and that caused the break. The hinge is still tightly secured in the balsa block, so no worries there. I only show one side of the rudder but both sides look the same.
First I picked away as much paint as I could in the break area. Then I took my heat gun and tightened up the covering. Surprisingly, that also cleaned up most of the cracks in the paint making them invisible. Next I took a T pin and opened up a hole just large enough to get the micro tip of my thin CA bottle into just behind the LE. I laid the rudder over on its side and then commenced to saturating everything on the inside with thin CA. So much so that it started to drip out on the other side . That actually worked out to my advantage and presto the rudder was structurally fixed. If it breaks again it will be surgery or recovering  . 
To repair the paint I did a little light sanding and then with a small paint brush I filled in the large cracks with paint. The paint tends to pool and flow into the void building the surface back up level to the surrounding paint. After this dries I will do a little sanding to smooth it out some and then air brush over the top blending it all together followed by a clear coat. This should give me a nice clean repair; that's the theory anyway.
|
| Back to Top Printer Friendly Version Profile
Search
|
| |
|
|
rb27989
Site Supporter
|
Joined: January/19/2023
United States
Posts: 677
IP Logged
|
| Posted: April/04/2025 at 7:33am |
Quote
|
|
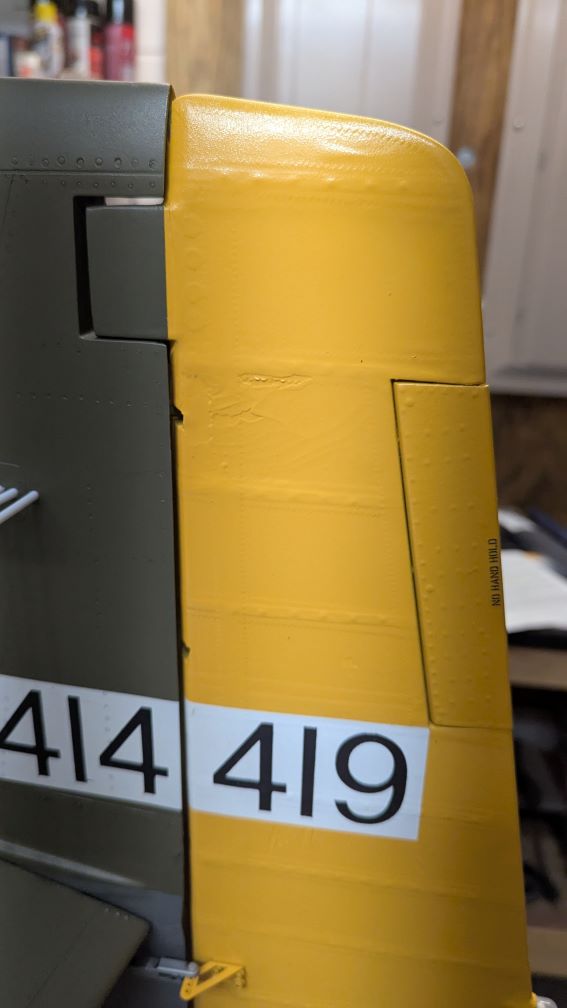
Rudder repair complete. I sanded the area and then air brushed more yellow over to blend everything together. After it flashed I followed up with a matte clear.
Not too bad, the chipping still shows through a little, but if this repair holds up I'm good with it.
While I had the clearcoat out I finished off the new spinner. Looks a little shinny in the photo but the clear was still a little wet. Ha, Ignore the algebra on the paper, my daughter needed some assistance with her homework last night and I'm the resident mathy .
|
| Back to Top Printer Friendly Version Profile
Search
|
| |

![]](/skins/text/forum_images/header-bg.gif)
![]](/skins/text/forum_images/top-left.gif)
![]](/skins/text/forum_images/left-side-table-bg.gif)
![]](/skins/text/forum_images/right-side-table-bg.gif)
![]](/skins/text/forum_images/hide_min.gif)