|
|||
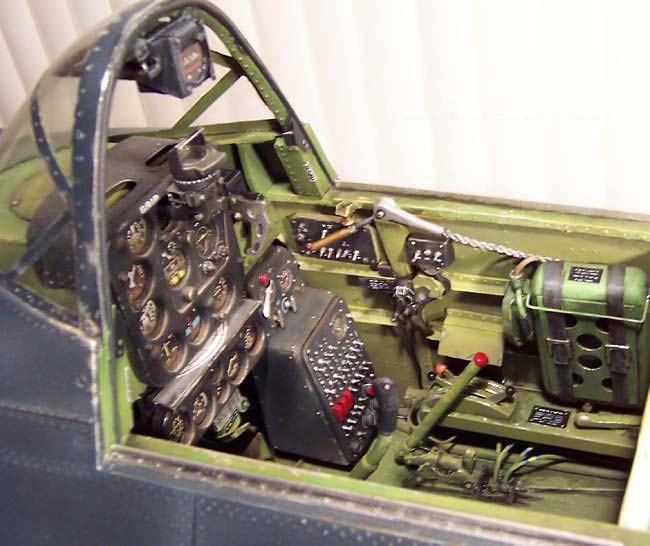
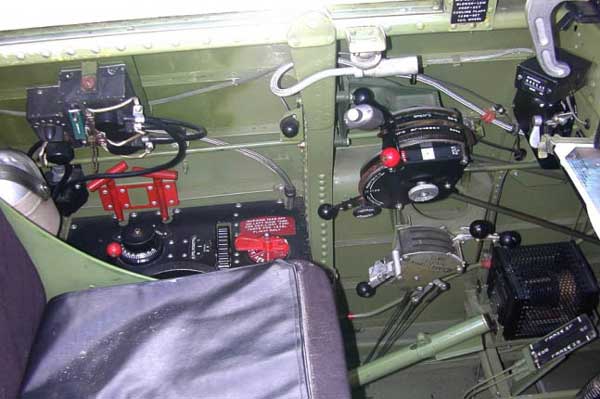
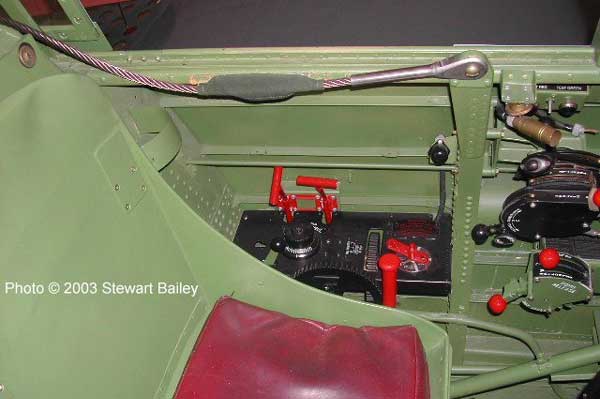
Full-scale SBD restoration photos
|
Picking your target
One of the most time consuming and difficult aspects of this task is researching your interior and coming up with a "target" for what you feel your cockpit should look like. If you're building a plane that currently exists and you can get all the photos you need, this is much simpler. However, if you're doing a historical aircraft, you may find that a handful of archival photos and a bunch of restoration pics is all that you'll be able to come up with. Why is that a challenge? Well, because like me, you may find that virtually no 2 photos agree on what the components should look like. Each "restorer" tends to deal with their own individual challenges in "reconstructing" what they thought the cockpit should be laid out like, as well as what would be available in terms of functional flight equipment. The end result is a wide variation of layouts, paint colors and even presence of certain equipment. Also, many have "upgraded" some avionics and radio equipment to meet today's standards, so you will find cockpit gauges with pictures of "jets" on them, or a AM/FM radio in the dash. Do your research, find the most common ground, and make a judgement call. Bottom line is you are trying to make a believable facsimile of the original cockpit, one that looks "real" more so than one that is "right." |
||
|
Surface Materials For the biggest part, styrene is ready to paint as is. You can primer it if you like, or go straight to color paints. Sometimes I will primer an assembly so I can see how my joints will look after painting, and sand/file as needed. One of the best tips I can give you in regards to surfacing is to try out some FliteMetal material. If you're not already familiar with FliteMetal, it is an aluminum tape with an acrylic adhesive backing. It' very light and thin, at .0015 inch thick w/self-adhesive aluminum and weighing only .0022222 ounce to the square inch. Many guys, especially jet builders cover entire airframes with it to simulate a natural metal finish. It can be scuff sanded to simulate directional metal grain, which really makes it look realistic.
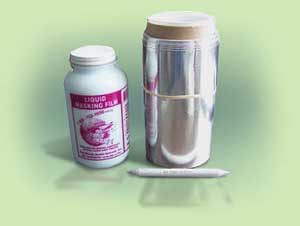
FM is quite a bit lighter and thinner than HVAC tape, and it is more "flexible" as well. I believe it can stretch something like 10-12% of it's surface area, while HVAC tape does not stretch at all. This is critical to getting it to conform around curves and details, and also makes it much more forgiving when applying. Lastly, the acrylic adhesive does not "gas off" at 95+ degree temperatures, meaning you won't get bubbles at the field on those 100 degree days! For more information on FliteMetal, and/or to purchase the material, visit the ScaleAero/BuyAero web site. I use the FM material when I want to be able to sand the paint back to a metal finish, simulating natural wear. This is a great weathering technique for interior components that get a lot of abuse, such as cockpit floors or seats. I also use it on cockpit walls. Why? Because I actually use posterboard to make my walls, then surface them with FM so I can paint them. But, that's a topic for another article! Lastly, I use Bob Dively Liquid Mask to mask of gauge lenses, lever knobs, etc. when I am painting a component that has areas that need masked. This stuff is awesome... easy to use and extremely versatile for masking odd shapes and tiny details. This product is available at Tower Hobbies. Fabrication materials The heart of the fabrication process is choosing the right materials for the job. Which material depends on which component you are working on, but one thing is always the same... weight. Making cockpits would be a cinch if we didn't have to keep an eye on the weight. Large scale warbirds can usually handle a good bit of weight without too much degredation of performance as opposed to 3D/aerobatic planes. However even still, you don't want to go overboard with the poundage. Also, 1/6 scale and smaller planes, and those like the SBD that have 2-3 position cockpits can double to triple your overall cockpit area and resulting weight. This is one of the many reasons I choose the materials and techniques I do... to keep the weight down. The most prevalent and critical material I use is styrene plastic. It's lightweight and very easy to bend and carve into a variety of shapes. Also, it comes in a wide array of preformed stocks such as rods, tubing, L / T / U channels, I-beam and of course sheeting. It also comes in different diameters, thicknesses, etc. which speeds up the process and makes it much simpler to build complex components at a variety of scales.
I keep a pretty well stocked assortment of rods, hex rods, channels, and tubes at various diameters. I also keep a pack of both 10 and 20 mil sheeting, and a pack of clear styrene sheeting. I find this allows me to work fast without having to run to the hobby shop all the time. Another good tip for working with styrene is to have a bottle of Plastistruct Bondene on hand. This is a special solvent that you can use to "weld" 2 pieces of styrene together. It works great on joints where there is a lot of surface area making contact, but small joints can be a little to brittle for this solvent.
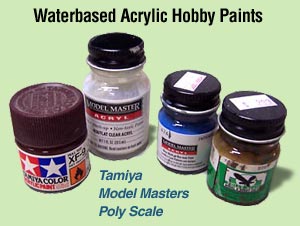
Other materials used obviously include balsa wood, light ply and aircraft ply. Sometimes I use some fine aluminum rod, metal pushrod stock, hardwood, micro pushrods & tubing, and whatever else seems right for the current task. What little putty work I do is done with Squadron White Putty which can be purchased at hobby shops or on the web. Interior Paints I use waterbased acrylic hobby paints 99% of the time on my interiors. My favorite/preferred brand is Model Masters. I also use PolyScale and Tamiya from time to time when I need a specific color that I can't get in MM brand. I don't really like Tamiya brand at all. It takes too long to dry, is too thick, and doesn't lay down well at all. However, sometimes I need it for a special color, or just have some left over that needs used up.
Obviously it is also critical to keep some good paint brushes on hand as well as a decent airbrush. My brushes are all Grumbacher camel hair brushes, ranging from 1/4" down to 00 size. My airbrush is an Iwata Eclipse gravity feed, dual-action brush.
|
|||
 Once applied, I use the FliteMetal burnishing tool, called a "stump", to burnish it down very smooth to the surface of the components. This tool is very important to getting the best results with FliteMetal. At first glance, FliteMetal appears to be the same thing as the aluminum HVAC tape that you can buy at Lowe's or Home Depot... but it's not. I've used that stuff before and FM is much better and easier to apply.
 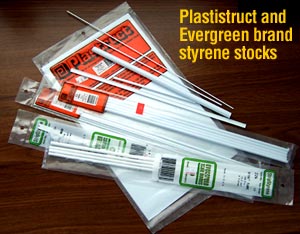 I use mostly Plastistruct brand styrene, but also use some Evergreen brand. These can be purchased at many Hobby Shops, especially those that are heavy into the model train line. You can also do a search on the web and come up with many distributors.
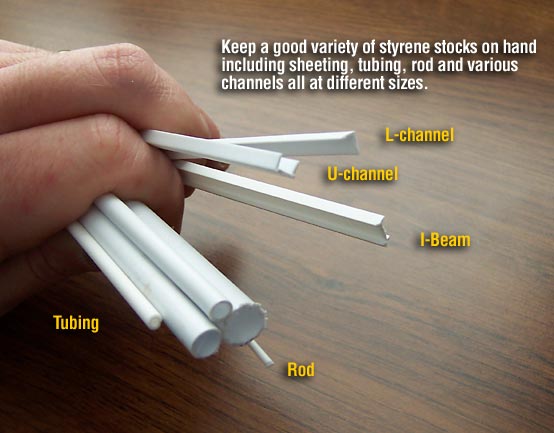
 Here are the colors that I always keep on hand...