Applying Panel Lines And Rivets
|
By Stephen Carr
Look at any full size metal skinned aircraft, and you will
see numerous panels of aluminium curved and formed to achieve a
three-dimensional shape. It is impossible to produce an airplane from a single
sheet of aluminium, and so the various components are broken down into areas,
which can be formed from a flat sheet. The panels are joined to the skeletal
structure in different ways for speed and economy of production or efficiency
of the airframe.
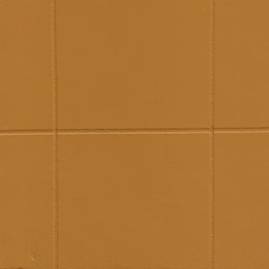
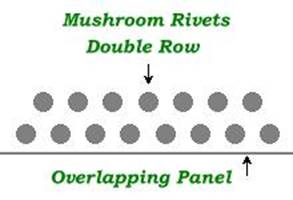
OVERLAPPING
PANELS
Overlapping panels do just that - overlap. Starting at the
trailing edge and tip of a wing, the first panel is applied. The adjoining
panels inboard and ahead, overlap this first panel by varying amounts depending
on the airplane size, then one, two or more rows of rivets pass through both
skins and into the supporting structure below.
|
|
|
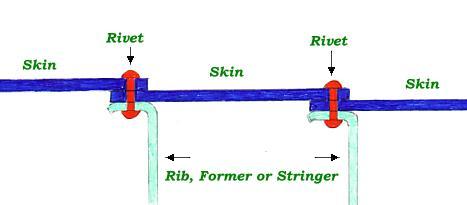
A section through a mushroom head riveted skin with overlapped panels |
|
|
|
|
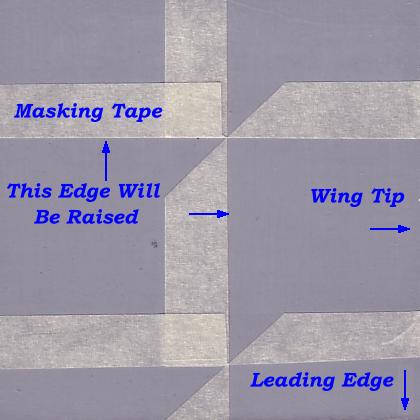
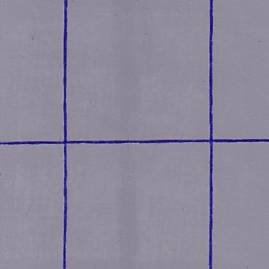
With the panels marked in pencil, masking tape is applied to the trailing edge and root side of the lines |
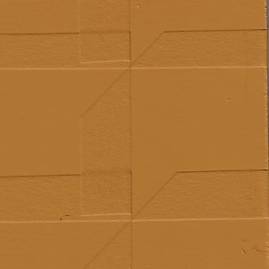
Next the
area is sprayed with filler primer |
|
|
|
|
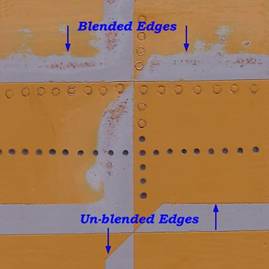
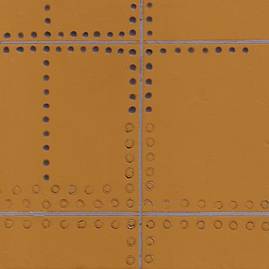
The masking is removed as seen in the lower part of the picture, and then the unwanted edges are blended with wet and dry as in the upper part of the picture. Flush rivets ( rings ) or mushroom rivets ( dark dots ) are then applied |
The silver under or topcoat is added ready for markings or camouflage colours. Note the un-blended edges in the bottom half of the picture |
BUTT JOINTED PANELS
Again, self-explanatory. Here the panel edges butt against each other, with their surfaces remaining flush. A row of rivets runs along the edge of both panels to secure them to the structure. To make the most of the efficiency of butt jointed panels, flush finish rivets should also be used. It is a fairly well known story that during the Spitfire's development, the flush riveted airframe had split peas glued on, to explore the areas of the airframe where the quicker to apply mushroom rivets could be used, without adversely affecting performance.
|
|
A section through a flush riveted skin with butt jointed panels |
|
|
|
|
Firstly the gridding tape is applied along the marked out panel lines |
Next the area is sprayed with filler primer |
|
|
|
|
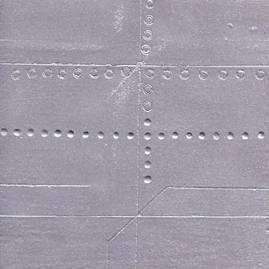
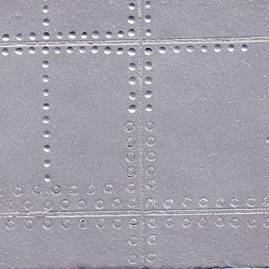
The gridding tape is removed and then the rivets can be applied. Mushroom rivets shown top and flush shown below |
Finally the silver under or top coat is added ready for markings or camouflage colours |
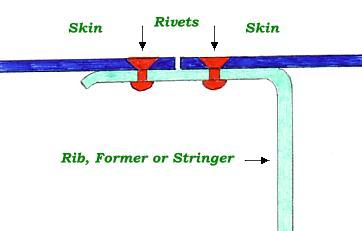
RIVETS
There are two types of rivet commonly used in airplane construction. They are the “Mushroom” head rivet and the “Flush” or countersunk rivet. Mushroom head rivets are quicker and easier to apply but cause more drag because of their domed shape. Flush rivets are a similar shape to countersunk screws and when fitted are flush with the surface skin of the airplane. When a full size airframe is painted, the circular appearance of the flush rivet can be completely lost in the thickness of the paint, or may only show as a depression.
|
|
|
A B-17 oil cooler intake and engine nacelle showing both Mushroom and flush head rivets |

When applying rivets to a model, bear in mind the scale of the aircraft and size of the rivets. In most cases, the rivets on a full size airplane will have a head diameter of ¼ inch or 6mm. Therefore on a 1/6 scale model, the head size should be only 1mm in diameter. If the scale is any smaller, it is probably not worth riveting as they begin to take on the appearance of dockyard rivets.
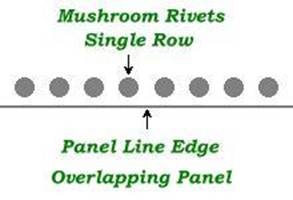
When producing rivets, you may or may not have already applied panel lines. The type of panel join dictates the rivet layout. Overlapping panels usually have only a single row of rivets, but in some higher stress areas, use a double row with the second staggered from the first. Flush jointed panels have two rows of rivets, one each side of the join line. As before, in high stress areas, two staggered rows will appear on each side of the join.
|
|
|
Mushroom Head Rivets
PVA glue is the best material to reproduce the mushroom rivet form. Use good quality woodworking adhesive is this is much thicker than that supplied to schools for example, which is watered down. Mix in some silver or silver/gray paint so if a rivet is exposed, it will have a natural metal appearance. Application can be made with a syringe or by dabbing a thin piece of wire into the glue and then dabbing it onto the airframe.
At first, both methods take time, but you will soon get into a rhythm and even spacing will come naturally. Remember the size of the scale rivet and apply only a SMALL drop of glue. Rivet lines should be marked out in pencil first remembering that rivets run along every rib, former and stringer, not just at panel joins. The airframe should then be sprayed silver to represent the aluminium skin.
Once the top colour coats and markings have been applied, a gentle rub with fine wire wool, in the direction of flight, will begin to expose the rivets. Don’t try and show every rivet of the model will look like a dot-to-dot game. The idea is to be subtle, giving more exposure in areas where wear is more likely such as walkways.
Flush Rivets
Flush rivets are applied using a soldering iron fitted with a piece of brass tube, either held with the tip retaining screw, or bound to the end with wire. The size of the rivets and the scale of the model dictate the diameter of the tube. Timing of the application of the rivets depends on the finished result required. Test pieces should be tried to find out which you prefer. Periodic cleaning of the tube will be needed to prevent clogging.
|
|
For flush riveting to work best, the whole airframe should have a coat of primer, as the rivets are melted into this paint surface. If the majority of the airframe is to be natural metal upon completion, the rivets can be applied before the silver topcoat of paint. Once painted, the sunlight will catch the indentations and the rivets can be seen. |
|
Here, a B-17 wing shows numerous rivets of single and double rows. This shows the rivets not just along panel edges but also along each rib and stringer |
|
When the end paint scheme is a matt camouflage finish, the rivets can be, or are, almost invisible. This also depends on the scale and size of the rivets. If you want them to stand out a little more, wire wool the airframe once the final topcoat and markings have been applied. This will then bring the edges of the circles through the paint slightly, allowing them to stand out against the paintwork. Apply other weathering such as exhaust stains etc., after the wire wool process.
|
|
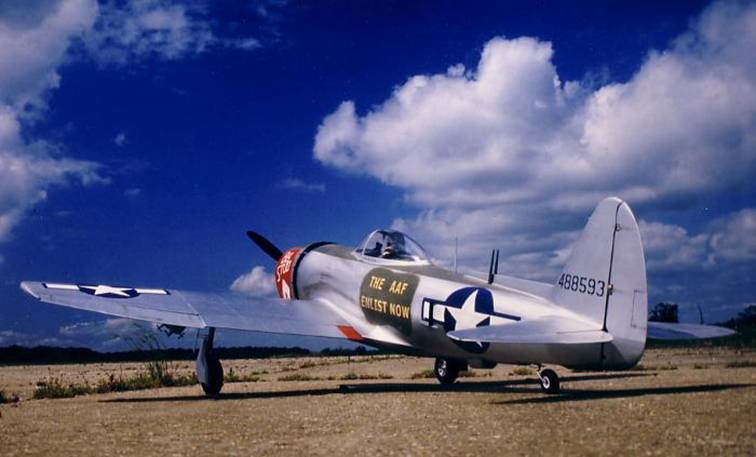
|
Stephen's P-47N at the Thorpe Abbotts reunion in 2000. In this picture, the rows of flush rivets can be seen on the wing, aileron and flap |