Producing A Convincing Pilot
|
By Stephen Carr
Almost all the "pilots" in the USAAF Team
airplanes, came from moulds produced by myself. Many commercially available
pilots are lightweight latex and are usually not very convincing. In addition
to this, they tend to shake themselves around the cockpit when the engine is
running, and after a couple of seasons, the sun turns them
black.
|
Enter "Action Man/GI Joe",
one of the many children's action figures available. As the Team aircraft are
1/6 scale, and "Action man" is about 12 inches high, he represents
a 6 feet tall pilot. For a single seat aircraft, modifying one of these
figures is probably the quickest route. While not a lightweight figure, most
1/6 scale airplane could carry the weight without effecting
the flying.
When you are faced with a bomber or
other multi-crew aircraft, weight and expense suggests another route, and
this is what I did for the B-17. The original head was cut from the body and
a facemask, cap, earphones, etc., were added with "Milliput" epoxy
putty. This material can be sculpted and shaped while wet and then left to
set. Find some period pictures on the net to work from. Once cured, the final shaping can be made using sandpaper, files etc making the product very workable throughout the process. The finished head was then moulded in silicone rubber. This would allow multiple heads to be produced, cast in resin. Hands were also moulded and cast in resin. |
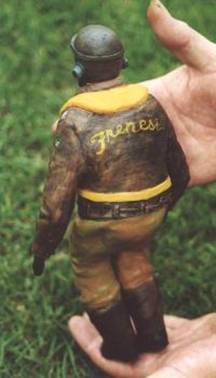
A complete 1/6 scale pilot using a resin cast head and a bought latex body. |
The body of the figure was cyanoed into a seated pose as if
flying, and "Milliput" was again used to add flight clothing, using
wartime photographs as reference. Once complete, the body is cut down lines of
symmetry to enable the parts to be vac-formed. Each arm was cut from the torso
and cut in half to give a top and bottom half. The legs were cut from the waist
and again at the knee. The lower legs were cut in half to give a left and right
half and the upper legs cut to give a top and bottom. The Torso was cut into
three pieces, with the neck and shoulders the first cut. The remaining part was
cut to give a front and rear half. Each body part had a 1/8 thick base of
styrene added to allow the full depth of each piece to be vac-formed.
|
|
Once formed, assembly begins. Joining vac-formed parts is usually not easy, but the task can be made much quicker by using a sheet balsa core cut to match the split line in the two parts. 1/8 balsa is usual enough, and this is glued into one half, allowing 1/16 of its thickness to protrude beyond the plastic moulding. This allows a lip for the second half to be glued to. Two balsa plates are glued in the torso at the waist and neck positions. These are drilled for a 1/4 dowel that will support the weight of the resin head. |
|
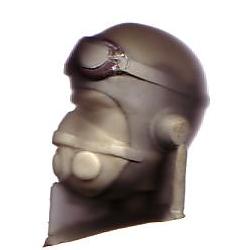
The original pattern for the fighter pilots head. |
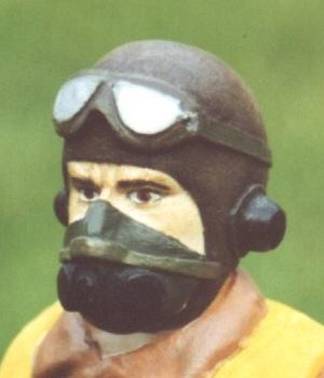
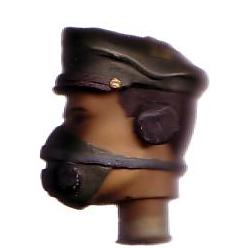
One of the bomber pilots heads after painting. |

When all the parts are assembled, plastic model filler can
be used to blend the joints between the mouldings. The pilot’s head is
best painted while loose, using the dowel support as a handle. The dowel, if
left suitably long, can extend through the body and into the seat or airframe
structure to provide a secure fixing.
|
|
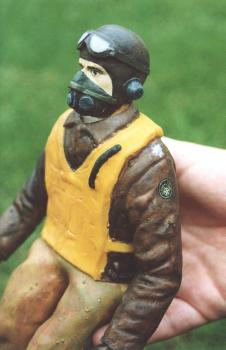
The completed pilots should look
realistic, be fairly light and can be positioned and clothed to suit any time
period and country. Two versions were made for the Team, a bomber pilot with
peaked cap and a fighter pilot/gunner with a leather helmet and goggles. There are many sizes of action figures
available so there's a good chance there will be one suitable. It really isn’t difficult; give it a go! |
|